The ancient Egyptians used hieroglyphics (or pictures) to communicate their thoughts and stories. These pictures are like symbols and are similar to the icons we use today on things like computers and cell phones. Each picture represented a letter or sound. The pictures were then put together to make words. They were written vertically or horizontally on stone or clay.
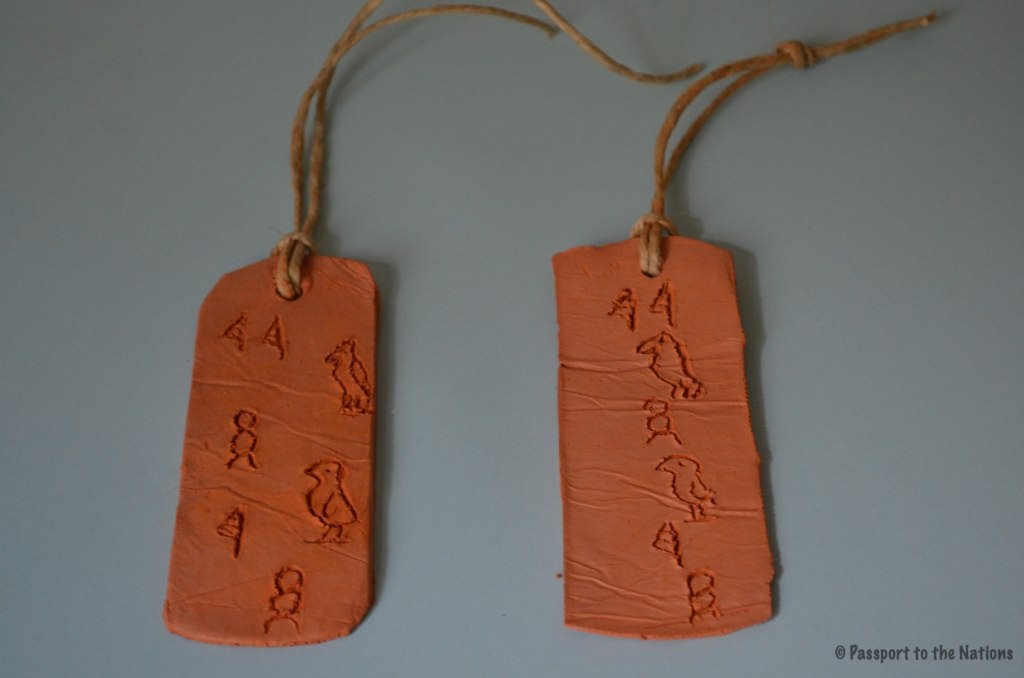
In addition, the Egyptian kings carried a cartouche. This cartouche had pictures that represented the king’s name and to whom he belonged, and was usually in the shape of an oval. These were similar to name tags that we use today and were only carried by high-ranking Egyptians, like pharaohs.
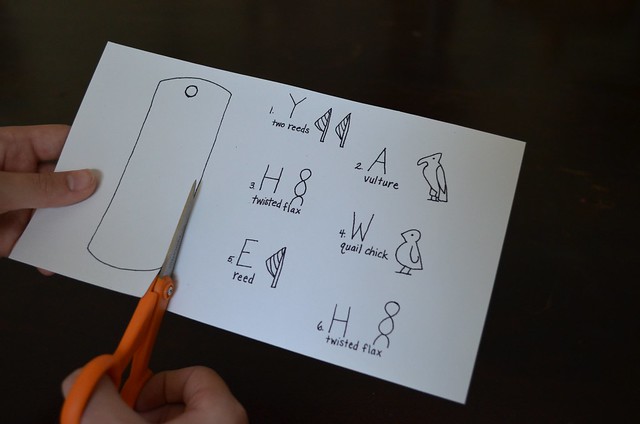
Today we are going to make an Egyptian cartouche. But instead of putting an Egyptian king or pharaoh’s name on it, we’re going to put the word “YAHWEH” on it. In Exodus, God revealed himself to Moses, Israel and Egypt as “I AM WHO I AM”. The Hebrew word for this is YAHWEH. Since God is the one true god, and the King of Kings and Lord of Lords, it would be fitting to use the hieroglyphs to spell out his name, YAHWEH, on the cartouche.
Exodus 3:13-14
Then Moses said to God, “If I come to the people of Israel and say to them, ‘The God of your fathers has sent me to you,’ and they ask me, ‘What is his name?’ what shall I say to them?” God said to Moses, “I AM WHO I AM.”
For this project you will need:
- No bake, natural, terra cotta colored clay
- Waxed paper
- Plastic Ziploc sandwich sized bag
- Plastic knife
- Toothpick
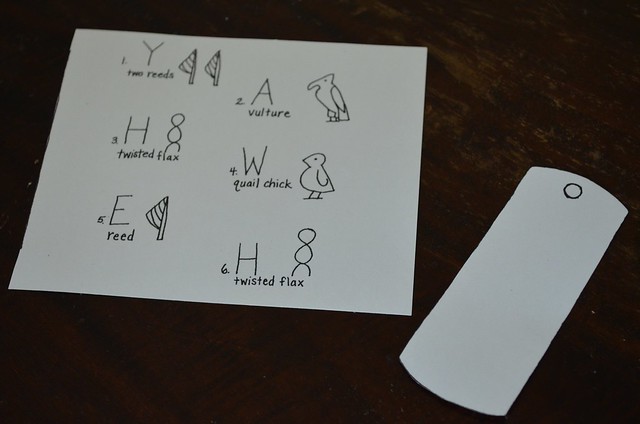
- Cartouche template with hieroglyphics
- Drinking straw
- Black permanent marker for labeling
- Rolling pin
- Scissors
BEFORE class:
- Divide the clay into the appropriate number of pieces. Roll clay between your hands into a “fat worm” shape. Fold a piece of wax paper in half and place the clay inside.
- Using a rolling pin, roll out the clay to 1/8” thickness. Rolling it between the wax paper keeps the clay from sticking and prevents breaking/tearing the clay.
- Place the wax paper with the clay inside in Ziploc bags until ready for use.*Be sure to keep the clay wrapped in plastic when not in use so that it will not dry out. Any unused clay should also be stored in a sealed, plastic bag.To be completed during class:
DURING class:
- Give each student a pre-rolled piece of clay large enough to work with the cartouche template. Take the clay out of the bag and pull one side of the wax paper away. Instruct students to leave cartouche on the other side of the wax paper while working on the project.
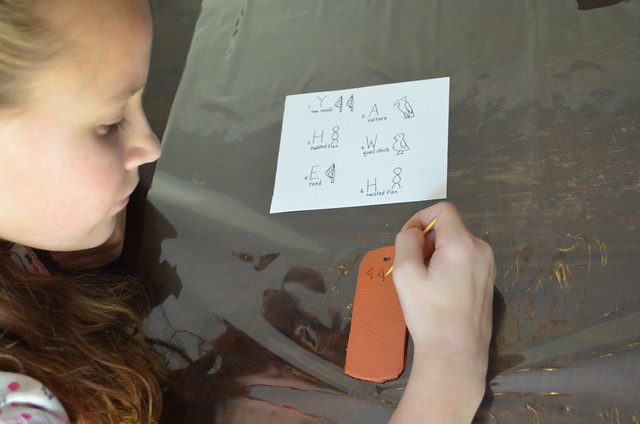
- Distribute a pre-cut drinking straw, cartouche template with hieroglyphics, and a drawing tool to each student.
- Write the child’s name with a Sharpie on the label.
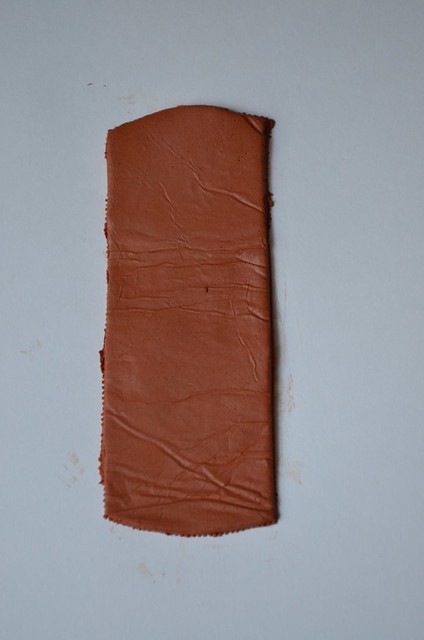
Have students cut out the cartouche template with scissors and place on TOP of clay.
With the plastic knife, trace around the template until the cartouche is cut out.
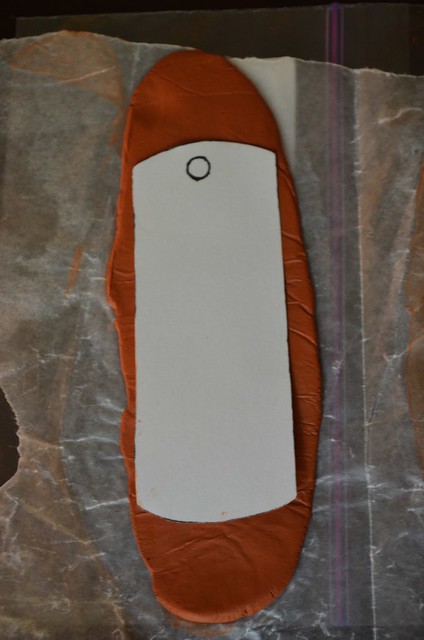
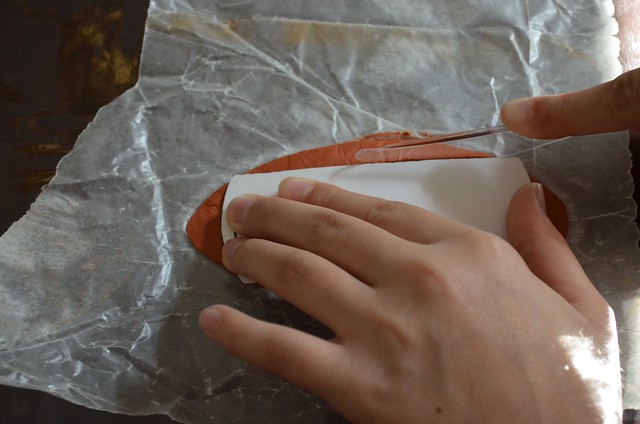
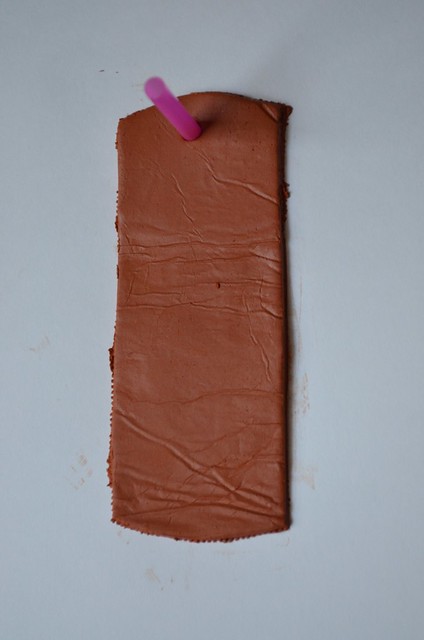
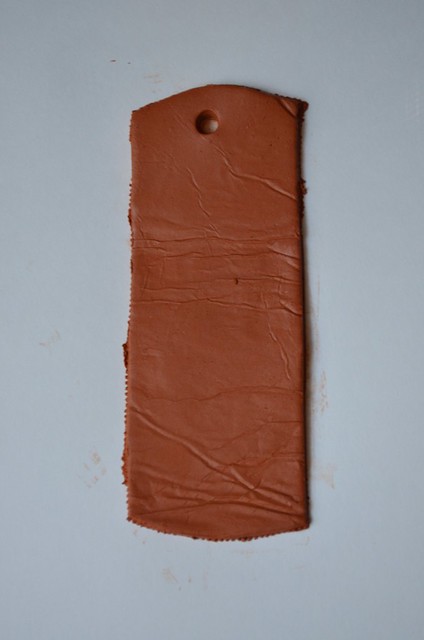
Use the drinking straw to punch a hole at the top of the cartouche. This will become the hole by which it can be hung by a ribbon after it dries. Use the template to demonstrate where to place the straw.
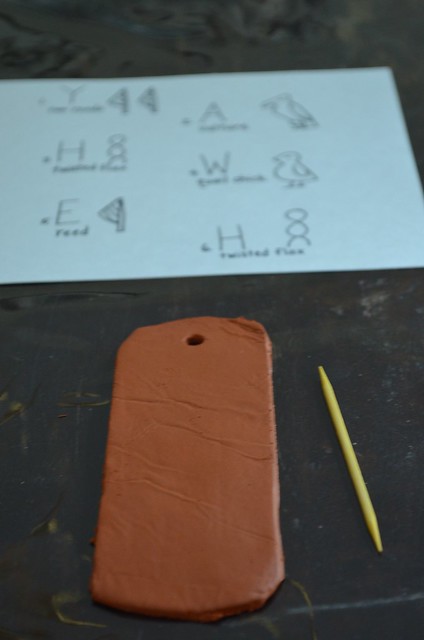
Look at the hieroglyphics and use the toothpick to carve the symbols onto the clay. Press lightly on the toothpick and clean it off frequently to keep the clay from clumping. Remember the Egyptians wrote from top to bottom and often staggered the symbols.
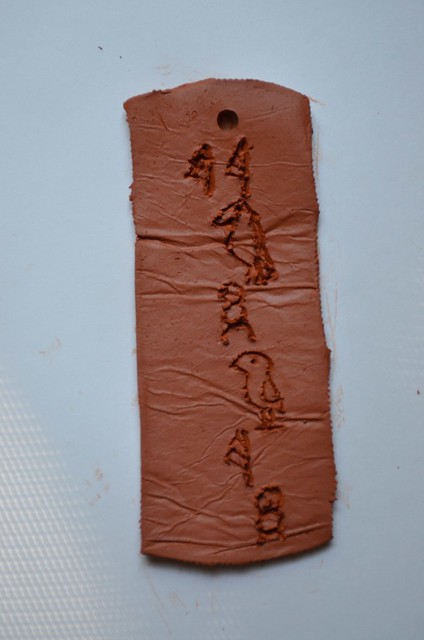
*If the YAHWEH symbols are too difficult, have the students write the word YAHWEH vertically and draw a cross on the cartouche. See example HERE.
Peel off the bottom piece of wax paper and place on the sandwich bag to dry overnight.
Once the cartouche is completely dry, thread a jute string through the hole.
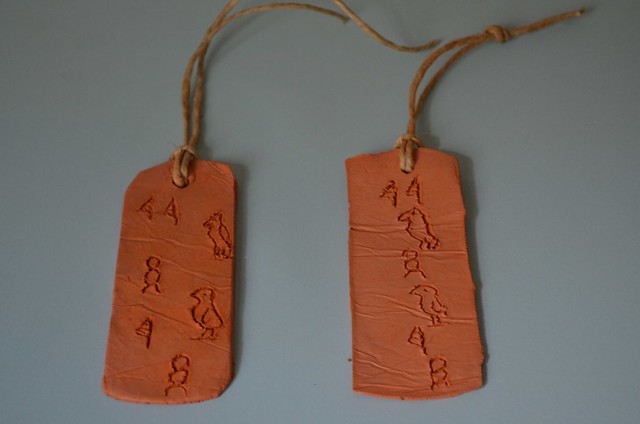
Place cartouche inside the sandwich bag for students to take home. The cartouche can be used as wall décor or as an ornament.